As a landscape photographer shooting outdoors utilizing the natural light that God has given us, you really do need to understand how light works and how it's interactions with the landscape and scene in front of you changes constantly as the sun orbits the earth.
There are several aspects of light which has a direct impact on the images that you produce as a landscape photographer and one particular variable to understand and contend with is the various different colour tones within the light spectrum and the various different colour temperatures that are associated with these colour tones.
So what is Colour Temperature?
Putting all of the technical jargon and the related physics aside and speaking just in layman's terms, photography at the most fundamental and basic level involves the recording of light and every light source gives off a different coloured light. The different colours are measured and expressed in a numbered scale known as the Kelvin Scale. This scale is denoted by the letter "k" after the number.
The above graphic roughly illustrates what approximate kelvin values are associated with specific light sources.
Typically, the higher the numerical value the more "cool" the colour temperature will be. Cold colour tones would consist of blue, white, etc... On the other end of the scale, the warmer colour tones consists of the reds, oranges, yellows, etc..
What about White Balance?
As the colour temperature of light changes, our eyes do a fantastic job of automatically adjusting to these changes and thus objects appear to be the same colour regardless of whether we are outside or inside or regardless of what time of day it is. On the other hand, the sensors within digital cameras are nowhere near as sophisticated as the amazing optical instrument that is the human eye.
Though the human eyes can automatically adjust to different lights and color temperatures to sense right color, a camera needs to be adjusted to different lights for accurate color reproduction. These adjustments are done through the White Balance setting.
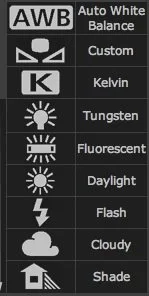
All digital cameras these days come with several predefined White Balance presets as well as the ability to create your own custom white balance preset and even the ability to manually set the desired kelvin value yourself.
The graphic on the right illustrates the symbols/icons as well as the names for these presets.
Apart from the "Custom" and "Kelvin" options, each of these presets has been programmed with a specific Kelvin value and thus will cause the resulting image to contain more or less of a cold blue colour cast or a warmer red/orange colour cast.
RAW versus JPEG - How White Balance is controlled with respect to each file format
As many of you either know already or will learn to know overtime, I am a big fan and promoter of the RAW file format and I name dozens of valid and strong reasons as to why every photographer but especially landscape photographers should be shooting exclusively using the RAW file format. In fact I have covered some of these reasons in my last blog post RAW Processing - Turning good captures into great images.
So let me give you another valid reason why the RAW file format trumps JPEG!
When your camera is set to shoot in JPEG, the produced JPEG file will consist of whichever white balance preset was selected at the time of shooting. The white balance setting is hard coded into the JPEG file that was processed and produced by your camera and you will not be able to adjust the preset at a later stage.
On the other hand, when shooting using the RAW file format, the white balance is not hard coded into the file and you have the option and flexibility to change between the various white balance presets when processing the RAW file in your software application of choice.
Of course it is not the end of the world if you were shooting JPEG and selected the wrong white balance setting, as you can always modify the colour temperature and tint when post processing anyway. With the being said though, why limit yourself in the processing stage?
It is always best to allow yourself to have as much flexibility and control over your image when it gets to the processing stage, hence why RAW is best!
NOTE: Although shooting in RAW allows you to set the white balance preset when processing the RAW file, the image preview on the back of your camera LCD screen will always reflect the white balance setting that your camera was set to at the time of shooting. This is because your camera creates small JPEG versions of the saved RAW files for previewing purposes.
Are colour casts a bad thing?
The answer is yes and no. It depends really on whether the colour cast was expected and/or desired.
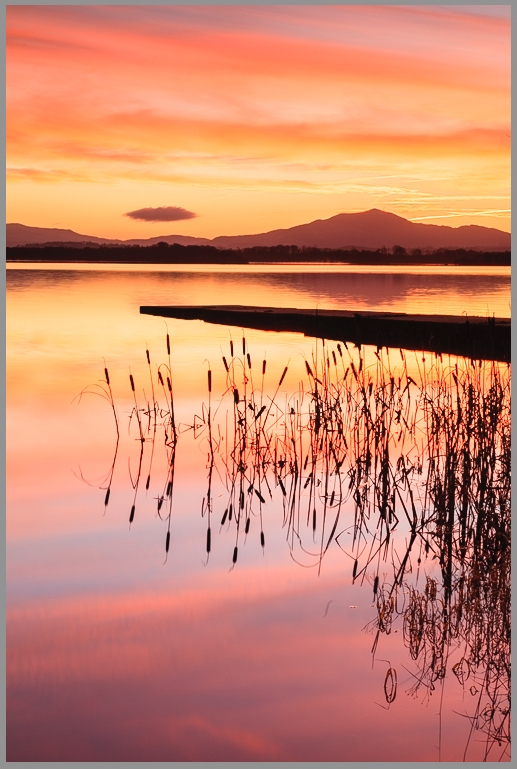
Take the two example images above. One was captured at dawn before sunrise so the overall colour tones consisted of cooler bluish tones while the second image was captured during a sunrise when the colour temperature was at its warmest and most intense. One could argue that the image on the left is too blue and the one on the right is too red. The truth is that they both do have colour casts throughout the image and that is due to the colour temperatures of the lighting conditions that were present at the time of capturing those images.
Upon clicking the shutter button on my camera, I had already knew in my mind that the expected images were going to consist of a cold bluish tone and a warm reddish tone respectively. So with respect to these particular instances the colour casts were very much expected and desired.
But of course there are always times as a landscape photographer when you might need to remove an unwanted colour cast such as the nasty looking magenta colour casts added into your images when shooting with Cokin Filters or the overly bluish colour casts you get when shooting with 10 stop ND filters such as the Lee Big Stopper.
In my next post I will provide some step-by-step instructions on how you can modify the white balance & colour temperature of your own RAW images and also how you can remove unwanted colour casts.


